Friday, January 27, 2023

HF 20m Dipole Antenna Project


Goal

Building a new monoband antenna which I'll orient in the opposite direction (east-to-west) to my other multi-band 80m Off Center Fed (OCF) Dipole that's installed in a north-to-south orientation on my property.

Height will once again be a challenge as I just don't have the trees or towers required to reach an optimal height for a 20m dipole of 42 feet. Instead, I'll have to live with 25 feet as that's the max height of the trees, ropes, and pulley's that I put up last year. The good news is trees grow, but I suspect I don't have the patience for them to reach 42 feet as part of their natural growth. 

What happens when a dipole is installed lower than the spec, it's radiation pattern angles higher towards the sky, this affects the range of the antenna since the signal transmitted will point more upward than towards the horizon. But my other off-center fed dipole is also lower than I'd like and I get plenty of decent contacts from that antenna, so I'm ok with the compromise.  

Ingredients 

  • Laundry line cable with clear plastic coating (salvaged from antenna project)
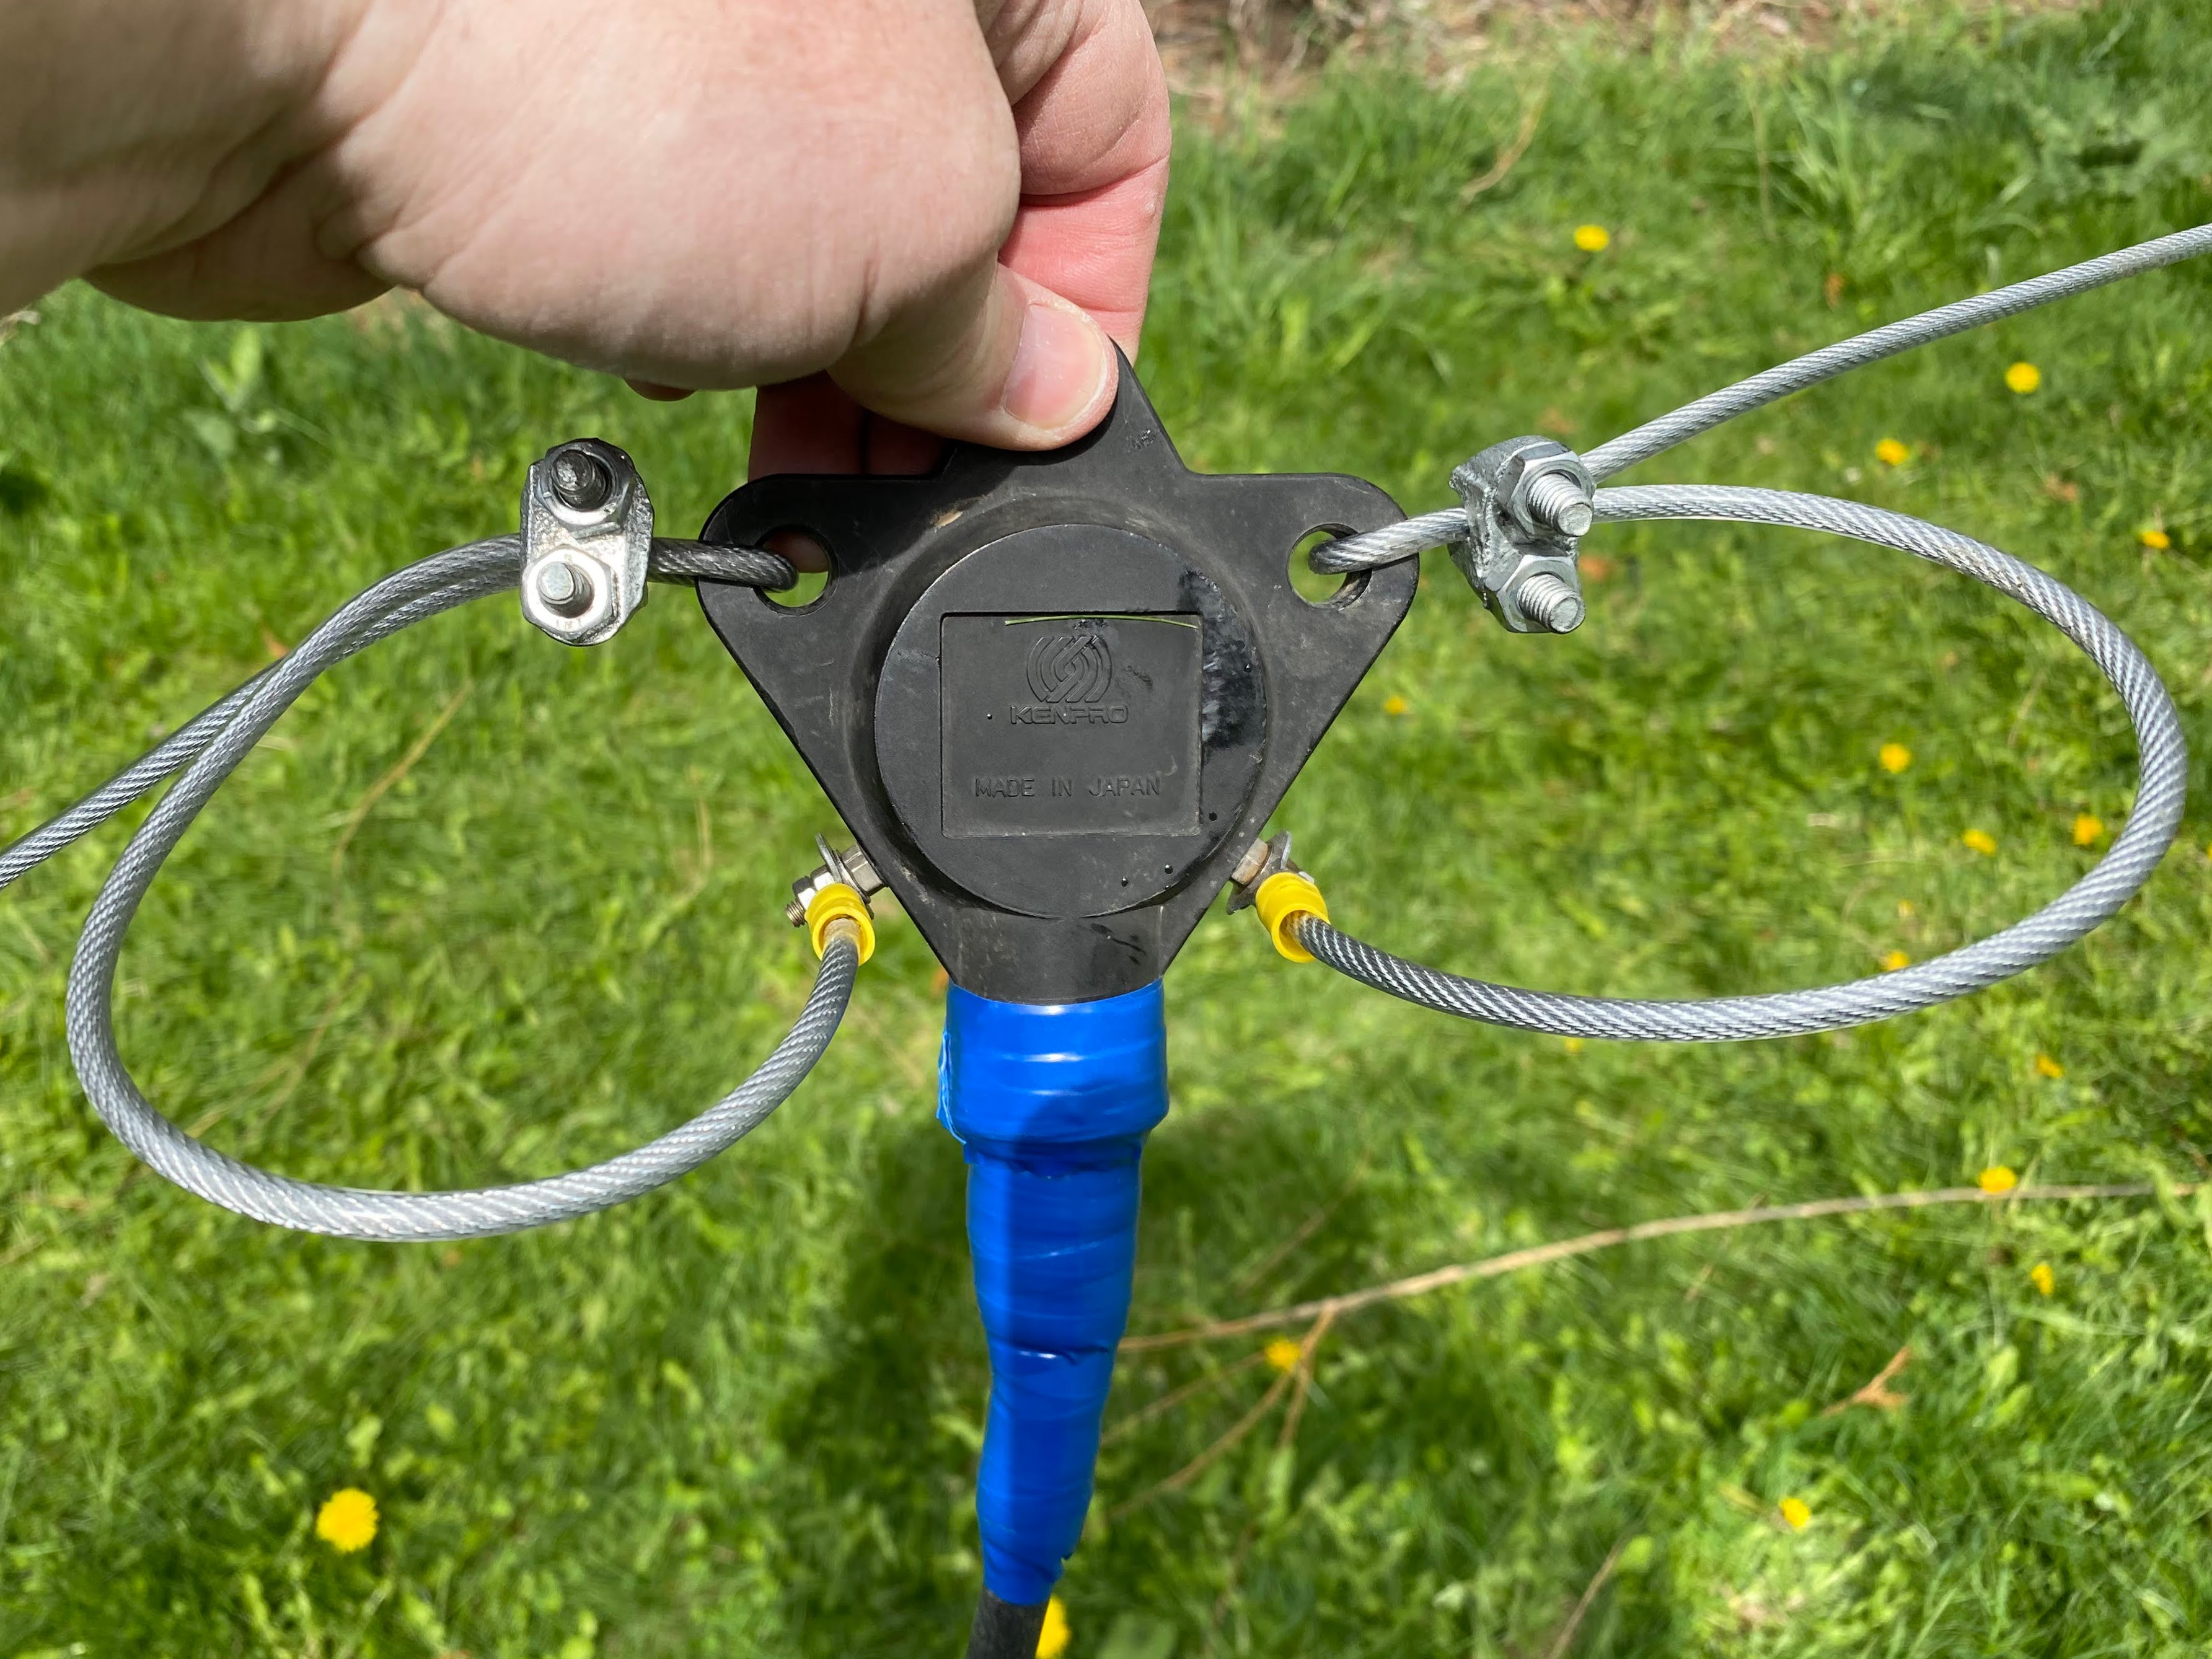
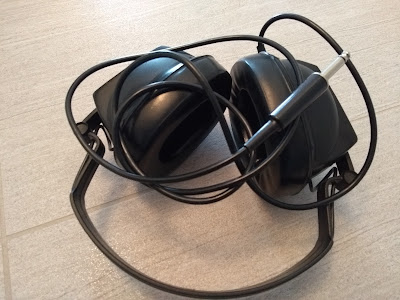
  • Kenpro KA-50 1:1 balun (full specs below, also salvaged from another old antenna) 
  • 50' RG-8 coax cable with the UHF PL-259 connectors
  • (2x) black plastic insulators
  • (4x) wire cable clamps
  • (2x) ring terminal connectors
  • Silicone rubber weatherproofing tape
  • Electrical tape

Specifications

Kenpro KA-50 (1:1 Balun)

    Freq Range : 1.8MHz-50MHz
    Impedance: 50 ohm
    Max power: 1kw CW - 2kw PEP (High Power Balun)
    Ratio impedance: 1:1

The measurements below are for building a simple Dipole Antenna. The Wire Size can range from 16 AWG to 12 AWG. The larger the wire, the wider the bandwidth. The antenna is designed to be fed with 50 Ohm coax cable of almost any length with a Balun. 

Place a 1:1 Balun on the antenna end of the Feedline. The Balun matches the Balanced Antenna into the Unbalanced Coax Cable. The balun will keep stray antenna currents off of the Feedline and help to keep stray RF out of the Radio Shack. If a Ferrite Balun is used, the balun needs to be rated at least twice the operating wattage to prevent the balun from overheating. This will help mitigate mismatches and stray RF due to using the antenna at frequencies other than what the antenna was specifically designed for.

Frequency: 14.175 MHz
Total Antenna Length ("L"): 33 Feet, 0.2 Inches
Element Length ("E"): 16 Feet, 6.1 Inches

Correct or incorrect I added 6 inches of extra cable at each end and marked the 16'1" measurements with a sharpie on the cable clear coating.

I soldered the ring terminal connectors to one end of each cable. 

Then using 1 cable clamp for each cable I secured the cables to the KA-50 balun so the weight of the entire antenna and coax is not hanging from the ring terminals. As you can see in the photo below the clamps are close to the balun and an evened length loop connects to the screw terminals on the balun.


I securely connected the coax feedline to the balun and wrapped it with the silicone rubber wrap. This stuff isn't easy to work with, the paper wrap sticks to it, but once wrapped you can grip the wrapped area with your hand and squeeze the silicone rubber tape to make a good seal all around.

After that, I wrapped the area again with electrical tape to protect the silicon wrap and the coax connection even more.


At the opposite ends of each cable, I looped the extra 6 inches of cable thru one end of the insulator and secured it with a cable clamp, like at the center balun. At the other end of the insulator, I attached the rope that will pull the antenna up into the air and hold it tight in a horizontal position. 

So, at each end of the antenna, it's going from the cable, to the insulator, to the rope, to a pulley secured in the trees at opposite sides of my yard. I can now leave one end tied off in the tree, and the other end can be lowered to the ground for tuning.


Sunday, December 18, 2022

New Silver Star Weather RADAR Station

Canadian RADAR gets a big upgrade

Digital Writers - The Weather Network

https://www.theweathernetwork.com/ca/news/article/canadian-radar-gets-a-big-upgrade?fbclid=IwAR3mkXR8lNNZiU9-7seK3mlDaR7OcND9p22u86XKX_aEJWMYJ_63lxPP7-s


Canadian Western Steel - Timelapse RADAR Tower Build


MMDVM Pi-Star Hotspot - Quick Replacement of the SD Card (Repair Notes)


In recent months the web server in my MMDVM Pi-Star hotspot has been failing during operation. The TX/RX from the hotspot continued to work, but any opportunity to interact with the device using the web server resulted in the pages not loading.

Yesterday I decided to entirely rebuild the unit's SD card using the following process. These notes are as much for me if I need to repeat the process again in the future.

Failure of SD cards is very common after continued use, especially in devices like this that run 24/7. The entire card might not fail, but sectors on the card can easily fail.

Steps

  • Rebooted the hotspot and got access to the web interface temporarily.
  • Took a current backup of my settings and downloaded/saved the file on my laptop.
  • Note, this method requires Wi-Fi so a laptop or desktop with Wi-Fi capability is required.
  • Slow formatted a replacement SD card to verify that all sectors are good.
  • Downloaded the latest Pi-Star image from Pi-Star Downloads - pistar.uk
  • Flashed the new image to the new SD card using the Raspberry Pi Imager app Raspberry Pi OS – Raspberry Pi
  • Power down the MMDVM hotspot, full out the old SD card and replace with the new SD card
  • Boot the MMDVM hotspot off the new SD card, leaving LOTS of time for initial boot steps to occur and the setup Wi-Fi access point to load (SSID = Pi-Star-Setup)
  • Connect the laptop to the new temp SSID and load the start-up pages for Pi-Star
  • Go straight to Configuration > Backup/Restore
  • Load the backup file from step 2 and upload the file and Restore.
  • Go back to Configuration and change the Wi-Fi settings to the stored settings from your home network (settings were stored in the backup and just need to be selected and applied.
  • Reboot the MMDVM hotspot and everything should come up just like before the new card was installed.

High Bit Rate Error Tweaking

My particular MMDVM hotspot came with a sticker indicating the frequency offset preferences for TX and RX. In the case of my unit that was an adjustment of -475 for each.

When receiving from the Parrot Reflector I noticed that the bit rate error was as high as 4% and adjustment was required. I found a good instruction from someone and followed it to make quick work of the problem. Like tuning an antenna you make some broad adjustments, then when you find the range where it's working better you begin to dial in the better settings by making smaller changes in either direction.

These edits are made at Configuration > Expert > MMDVM

Here is a short summary of my adjustments and how they were working.

-475 = 4% BER (not good)
-575 (broad change of 100) = .5% BER (very good)
-675 (broad change of 100) = 1.2% BER (trending worse)
-625 (medium change of 50) = 1.1% BER (trending better)
-575 (medium change of 50) = .8% BER (very good)
-525 (medium change of 50) = 1% BER (trending worse)

You won't get identical readings on each transmission, but you can see that at -575 RX Offset I received the lower settings of .5% - .8%. After two readings below 1% BER, this was the setting that I left it on for RX. TX remained at -475 as per the manufacturers' sticker.


Monday, February 28, 2022

IARU Note On Radio Communications from Ukraine

https://www.iaru-r1.org/2022/note/

Feb 27, 2022 · HF · Tom, DF5JL


“Any radio amateur currently transmitting from Ukraine is risking his or her life. If you hear a Ukrainian station, do not broadcast its callsign, location or frequency — whether on the band, in a cluster or on social media. You may be putting lives at risk.”


Source: DARC HF Committee via facebook


Thursday, February 17, 2022

Annual RAC Renewal

Thank you! Your Radio Amateurs of Canada account has been updated.

Radio Amateurs of Canada

Thank You Aaren Jensen for renewing your RAC membership with the Radio Amateurs of Canada.

Your membership expires on:   March 3, 2023

You can request a personalized membership wallet card at https://www.rac.ca/membership-card-request/.

If you wish to obtain email forwarding using your call_sign@rac.ca please contact the webmaster at https://www.rac.ca/webmaster/.

You can place online orders for RAC and ARES merchandise at https://www.cafepress.com/rac_radio.

In accordance with the new anti-spam laws please subscribe at https://www.rac.ca/rac-notifications/ to have your email address added to our mailing list.

If you have any trouble, please feel free to contact us.

Best Regards,

Radio Amateurs of Canada

Wednesday, January 19, 2022

Drake UL68 Communications Headphones

Copied from https://www.universal-radio.com/used/sold688.html

UL68 Drake Headphones
The Drake Headphones are monaural and terminate to a 1/4 inch phone plug. There is nothing particularly noteworthy about these headphones other than the Drake logo on the left earpiece and right earpiece. Not stellar headphones, but a rare find for the Drake collector. [06/14]

I really enjoyed this short description/review. I guess I'll need to test them out for myself. 

If anyone has any more technical information on these that would be greatly appreciated. I collect headphones and headsets for various purposes including Audiophile, Gaming, and Radio Communications.

With a mono 1/4 inch phone plug these are squarely in the Communications category, with Drake being an old amateur radio brand still popular with collectors.

Took me some time on the web to even find an actual model number (UL68), and it didn't help that a popular modern Canadian recording artist (Drake) dominated the search results about what headphones he personally uses when in the studio recording. Also strange that Beats by Dr. Dre also dominated the Drake Headphone searches since Drake the artist never sponsored any Beats headphones that I'm aware of?

Anyhow, another set of 'cans' for the wall.


Monday, August 16, 2021

North Okanagan Wildfire Scanner Feeds

Are you interested in monitoring the BC Forest Fire Service in the North Okanagan area, feel free to use these streaming links which do not require any radio equipment or the sharing of special or private frequencies. 

The use of streaming links assures that radio interference does not occur from the general public monitoring. When using actual radio equipment the operator could improperly transmit on these critical channels if the radio is improperly programmed or the user is improperly trained on its use. 

Streaming links also offer excellent audio quality as the radio receivers being used are located where the signal is strong and clear. 

Photo Credit: Contributed photo from Castanet.net
White Rock Lake fire photo taken from across the lake from
Canadian Lake View Estates in Vernon at about 11:15pm on Sunday


Web Browser Streams

Stream Title: North Okanagan Scanner

http://provoice.scanbc.com:8000/

Scroll down until you reach Mount Point /northok

Stream Description: BCEHS, Regional Fire Dept, BC Forest Service

Content Type: audio/mpeg

Stream Genre: Scanner

Social Media Stream URL: https://twitter.com/northokscanner


iOS and Android Apps

Browser your device app store for Police Scanner Radio & Fire

Download the free app. Listening for free can be done with the occasional interference for ads. You don't need to purchase the app subscription unless you wish to pay and go ad-free.

App appearance in the app store (iOS)

App icon on your phone after installation (iOS)

Once you have the app loaded and running search for North Okanagan RCMP Fire BCAS and SAR

You can mark the feed as a Favorite so it's easier and quicker to find it later.


Tuesday, July 06, 2021

Network Power Control for Remote HF Stations or Repeaters (Luxul PDU-02)


Controlling the AC power on equipment in a remote location can be very helpful. The scenario I think of is a repeater 'locking up' in the dead of winter, getting to the site is difficult. It will take time to get to the site. In the end, you only need to turn the equipment off and on again. A job that should only take a few minutes if you can do it remotely over the internet.

Whether it's your remote PC, HF transceiver, or a repeater, if you have networking and the internet, a PDU can be a very handy piece of equipment.

My local ham club has a custom programmed Raspberry Pi doing multiple functions in one of our repeater shacks. Remotely rebooting that Pi has already been seen as a valuable feature especially in the dead of winter.

Recently I picked up a number of the Luxul PDU-02's. A professional piece of network power equipment designed for purposes like networking, home theatre, automation scenarios. MSRP on the PDU-02 is approx $225 US.

The setup couldn't be simpler.
  • Plug the provided 2ft. power cable into an AC power source. Any standard IEC PC power cord can be used if you need something longer. 
  • Plug the network into the ethernet port. Add the provided RF choke to the ethernet cable as close to the PDU as possible.
  • Plugin the power cables for two devices (or a string of devices on power bars if you need more plugs).
  • Get onto your network with a PC or laptop
  • The PDU will pickup an IP address over DHCP. If the PDU 2 fails to find a DHCP server the unit will default to the IP address 192.168.0.6. You can use a network scanner to identify what IP it's using and plug that into your web browser to access the device's handy web interface.
Key features and specs.

  • Individual IP outlet control of 2 outlets.
  • 12 amp continuous load, 15 amp peaks.
  • Easy setup and control
  • IP “Autoping” and recovery for optimized system reliability
  • MOV surge and spike protection
  • Fast and easy configuration
  • Automatic actions improve system reliability
  • Automatic notification of connection status
  • Control start-up or shut-down with remote sequencing
  • Seamlessly interfaces with third-party control systems and cloud platforms for scheduling, control, reporting and customization
  • 3-year limited warranty
  • Connected equipment warranty
  • Mounting kit included with a metal bracket for wall or flat surface mount.
  • RF choke provided for ethernet cable
  • Ground connector built-in.
  • The unit shipped with the latest firmware 1.10.00
  • Three account levels are built-in (admin, user, control system account). 
  • Accurate time from a network time source.
  • Configure email alerts.


The web interface for the PDU has all the basic features and is very nicely laid out.


Specifications Document


Saturday, June 26, 2021

Field Day 2021

Official Times

Field Day is always the fourth full weekend of June, beginning at 1800 UTC Saturday and running through 2059 UTC Sunday. Field Day 2021 is June 26-27.

Local Start (British Columbia, PST)

  • 6:00 p.m. Saturday, Coordinated Universal Time (UTC) is
  • 11:00 a.m. Saturday, in Lumby, BC
Local End (British Columbia Canada PST)

  • 8:59 p.m. Sunday, Coordinated Universal Time (UTC) is
  • 1:59 p.m. Saturday, in Lumby, BC

Tuesday, June 15, 2021

'Poor Hams' USB VFO Knob for PowerSDR & Legacy Flex SDR's


Don't get me wrong, the FlexControl from FlexRadio Systems is a fantastic VFO knob for your Flex SDR. But the price tag might scare some away, and people like me prefer to keep my FlexControl at home in the shack with my primary Flex SDR transceiver, away from the grit and grime of outdoor use.

But with my other Flex, I was looking for a smaller, lighter, cheaper USB VFO knob solution for outdoors & Field Day. Something that I wouldn't be as worried about losing or damaging. So, that's why I went down the rabbit hole of USB Volume knobs. Many of these are inexpensive but also hardwired to control volume and mute functions only on computers and tablets. I needed something programmable to mimic the mouse wheel or keyboard clicks that would adjust my VFO up and down and other functions like locking the VFO.

Thanks to RemoteTX.Net (https://remotetx.net/usb-vfo-knob-setup/), I found a solution for certain USB Volume knobs with a hidden programming feature. If it worked for their remote station solutions, maybe it would work for PowerSDR and my QRP Flex 1500?


What I decided to try was the AIMOS USB Volume Control from Amazon for under CAD $35, a big difference from the CAD $240 FlexControl from RadioWorld. Reading the online reviews for this particular USB volume knob I saw one person mention the hidden programming feature, and I was willing to give it a try.


When the knob arrived I attempted the hidden programming mode and was thrilled when it loaded as described. I won't try and replicate the fantastic instructions on the RemoteTX website, but I will go into detail about how the Flex PowerSDR configuration is different. Use the link above to get the really detailed step-by-step instructions from RemoteTX.net, then once you understand the process, you can read my notes on how I customized it for PowerSDR.

  1. First off don't plug the USB knob into your computer right away unless you want to test it for its volume control functions before programming it.
  2. Next, open the Notepad software on Windows and leave the Notepad window open and blank. Make sure the window is active (at the front of all other windows), in Windows jargon, this is called FOCUS, the app that you are interacting with.
  3. Hold the Knob button DOWN while you plug it into a USB port on the computer and then RELEASE the button after 1 second.
  4. Slowly after a few seconds, the text will appear in the Notepad window. 
  5. DO NOT touch the mouse or keyboard from this point on, ONLY USE the knob and its button function and the lists and menus that it generates in your Notepad window. This is how to make all programming choices until the programming is completed.
  6. For PowerSDR I programmed the clockwise motion of the knob to increase the VFO by the PowerSDR increments set in the PowerSDR software. This uses the keyboard modifier of CTRL, and the key of the UP ARROW key.
  7. Next, I programmed the counter-clockwise motion of the knob to decrease the VFO by the PowerSDR increments set in the PowerSDR software. This uses the keyboard modifier of CTRL, and the key of the DOWN ARROW key.
  8. Then I programmed pressing the knob down (like a button) to lock/unlock the VFO frequency. This uses the keyboard modifier of CTRL and the key of the L key.
  9. There are 3 additional programming options that I modified to NONE for both the modifier and the key. I might change this in the future, but I don't want to make it more complicated especially when sharing my portable rig with others at events like Field Day. These extra modes were;
    • Press+Clockwise Turn (maybe for mode change up?)
    • Press+Counterclockwise Turn (maybe for mode change down?)
    • Long Press (maybe for triggering the autotuner?)
  10. When you have the options that please you, one last step is clicking on SAVE & QUIT. After you get the OK! you should unplug the USB knob, wait a few seconds, plug it back in, and test your new programming with the PowerSDR software. 
Sample images of the Notepad programming screens


UPDATE


I have tested the USB Volume controller with the modified VFO programming on the final official version of PowerSDR ver 2.7.2, and also with Power SDR by KE9NS ver 2.8.0. Both work great. I did not test on newer Flex Radios (6000+) that run on the SmartSDR software.
  
Here is the PowerSDR Keyboard Shortcut list I used. I've highlighted the ones I used, the remaining three modes supported by the volume knob could be used with any of the other keyboard shortcuts listed below.


Key SequenceFunction
space barTX/RX Toggle after MOX is on until you click on any other button of the GUI
-AF gain decrease
+AF gain increase
*Mute Toggle
[XIT Up
]
, (comma)
. (period)
; (semi colon)
\ (back slash)
AFreq. Down 1 MHz*
BFilter Up*
C
DFreq. Down 10 KHz*
EFreq. Up 10 KHz*
FFreq Down 1 KHz*
GFreq Down 100 Hz*
HFreq Down 10 Hz*
IRIT Down*
JFreq Down 1 Hz*
KIF Shift Left
LIF Shift Right
MBand Change Up*
NBand Change Down*
ORIT Up*
PXIT Down*
QFreq Up 1 MHz*
RFreq Up 1 KHz*
SFreq Down 100 KHz*
TFreq Up 100 Hz*
UFreq Up 1 Hz*
VFilter Down*
WFreq Up 100 KHz*
XMode Change Up*
YFreq Up 10 Hz*
ZMode Down*
ALT+A
ALT+BToggle NB On/Off
ALT+CCW Form
ALT+D
ALT+E
ALT+FFilter Wider
ALT+GCopy VFO A to VFO B
ALT+HCopy VFO B to VFO A
ALT+IIF Shift Reset (centered)
ALT+J
ALT+K
ALT+L
ALT+MMemory Form
ALT+NToggle NB2 On/Off
ALT+O
ALT+P
ALT+QCW Speed Up
ALT+RRIT Zero
ALT+SSetup Form
ALT+TToggle TUNE on/off
ALT+U
ALT+VSwap VFOs A/B
ALT+WWave From
ALT+XXVTR Form
ALT+YXIT Zero Beat
ALT+ZZero Beat
F1CW Memory 1
F2CW Memory 2
F3CW Memory 3
F4CW Memory 4
F5CW Memory 5
F6
F7
F8
F9
F10
F11
F12
CTRL+ "up arrow"VFO A Increase freq. by tune step
CTRL+ "down arrow"VFO A decrease freq. by tune step
CTRL+"-"AGC-T Gain Down
CTRL+"+"AGC-T Gain Up
CTRL+AToggle AGC on/off
CTRL+BToggle NR on/off
CTRL+CQuick Save
CTRL+D
CTRL+E
CTRL+FFilter Narrower
CTRL+G
CTRL+H
CTRL+I
CTRL+J
CTRL+K
CTRL+LToggle VFO lock/unlock
CTRL+MToggle MOX on/off
CTRL+NToggle ANF on/off
CTRL+O
CTRL+PPreamp
CTRL+Q
CTRL+R
CTRL+SToggle Split on/off
CTRL+T
CTRL+U
CTRL+VQuick recall
CTRL+WCW Speed Down
CTRL+X
CTRL+Y
CTRL+Z
CTRL+ALT+UUCB configuration form


Tuesday, February 16, 2021

Amateur Radio in Canada. What It Is, And What It Isn't.

The statements and comments in this post are the opinions of the writer. If I'm wrong on important details please correct me. If you have your own 'opinions' feel free to express them elsewhere, this is my blog hi hi.

So many repeated threads online related to the hobby. Sometimes I have the patience to answer the same questions over and over, and sometimes I wish people would search or scroll down and find the same questions answered over and over in the previous posts.

1) An Amateur Radio 'Certificate of Proficiency' is issued to a person by the Canadian Government department ISED (Innovation, Science and Economic Development Canada) formerly Industry Canada. 

  • Many Amateurs refer to this as a 'license' which technically it's not. I'm one of those people that doesn't mind the term license as it's easier to say and remember.
  • An Amateur Radio 'Certificate of Proficiency' is issued when you pass the multiple-choice test with an Accredited Examiner. These examiners are volunteer Amateur Radio operators of a high knowledge level in the hobby who had been certified to run exams on behalf of ISED.
  • Passing the Basic exam with a score of 70% or higher is a pass. You will be issued the Basic Certificate of Proficiency in Canadian amateur radio and a callsign. You will be allowed to operate radios in the 6M band and above (VHF, UHF, Microwave).
  • Passing the Basic exam with a score of 80% or higher earns you the designation Basic with Honors. You will be issued the Basic with Honors Certificate of Proficiency in Canadian amateur radio and a callsign. This unlocks HF band privileges combined with 6m and above. So you can use ALL of the Canadian bands and frequencies allocated for amateur radio use.
  • Once you have your Basic Certificate of Proficiency you can stop, or continue to study and take the Morse code add-on (5 WPM in CW plus exam), or take the Advanced test and try for your Advanced Certificate of Proficiency in Canadian amateur radio, which grants some additional benefits like building your own radios and operating and maintaining repeaters.

2) An Amateur Radio 'Certificate of Proficiency' DOES NOT allow you to operate in other radio-related modes and systems in Canada including;

  • Marine radio (required to operate boats)
  • Aeronautical radio (required to operate planes)
  • Land Mobile radio (used commercially between work vehicles and office base)  
  • Rural Route radio (used on rural & logging roads to call out traffic locations)
An Amateur Radio 'Certificate of Proficiency' is only for use in the spectrum of radio assigned to the Amateur Radio hobby. Yes, this is a lot of bands and frequencies, but there is little to no overlap and one 'license' does not replace or substitute for another.

3) I'm an avid offroader and I was told Amateur Radio is an excellent way to communicate off the beaten path and utilize mountain top repeaters where the cell phone is out of range.

  • Yes, you can utilize amateur radio this way. You must follow the amateur radio rules and share the bands and frequencies with others. You cannot claim a frequency as your own, or tell others to get off your frequency.
  • Keep in mind if it's multiple people in your party, and each has a radio in their vehicle or on their person they ALL need an Amateur Radio 'Certificate of Proficiency' to communicate with one another.
  • You can't use your amateur radios for other purposes (like rural route radio communication on logging roads for example).
  • There are alternatives to Amateur Radio for offroading. Look into https://vernoncommunications.ca/4wdabc-gets-bc-wide/

4) What does it cost to get an Amateur Radio 'Certificate of Proficiency'

  • Typically it should cost $100. Radio clubs run courses that typically cost around $100. These will typically include the coursebook from Coax Publications with a value of $50 and will also include the classroom teaching and the final exam all together in that $100 bundle.
  • There is free course material online on the internet, the quality of that material varies, where the Coax Publication coursebook works on being up to date to match the current government exam.
  • If you chose to self-study you will need to find your own examiner and that might also include a small fee as examiners are allowed to charge for their expenses if they wish. 
  • If you research online well, you can find all the materials you need to study for free, you could also find an examiner for free, so potentially the cost could be nothing. More often people don't mind the $100 investment in getting classroom learning, a good book to keep and study from, and the convenience of an examiner-led scheduled exam at the end.
to be continued...


Sunday, January 10, 2021

Antenna SWR Chart


Click on chart image for a larger view

Spent some time in the shack this weekend moving cabling around and inserting the new LDG auto tuner in the previous blog post.

Whenever I make changes like this I like to test everything on the antenna analyzer to make sure the SWR doesn't change and also refresh my memory on which HF antenna provides the best SWR on each band.

As part of the process, this new chart was made and will be printed and placed at eye-level from my main operating position.

Key information presented in the chart;

  • Tuner input by name
  • Antenna assignment in the tuner
  • Antenna by name
  • All HF bands that are workable on either antenna.
  • All SWR levels from the approximate center of each band,
  • Color coding, green for SWR of 1 to 3. yellow for SWR of 3 - 5, orange for SWR of 5 - 10
  • In the blue cells, I identify the bottom and top frequencies for each band.
  • And finally, the grey cells identify the center band frequencies that I use when testing the SWR on each antenna with the antenna analyzer.
Happy to confirm that with just 2 HF antennas there are 8 HF bands that I can operate on with an SWR of 2:1 or lower. And I can push that up to 10 bands with the help of the tuner.