Friday, July 05, 2013

My First Amateur Radio Field Day

VA7AEJ (me, on the right) Saturday evening working 80m during Field Day 2013

If you follow my blog, (ha ha, I know that's such an incredibly optimistic opening comment) you'll know that I've only been a licensed Amateur Radio operator since Christmas of 2011. This means that the summer of 2012 and the summer of 2013 are the only two ARRL Field Day events that have come and gone during that period.

Last year my local club did nothing to celebrate Field Day. So, I sat at home that weekend and casually made a few contacts as a One Delta and got a bit of a feeling of what all the excitement was about. It was a busy weekend on the bands and I enjoyed listening to people work the pileups, as well as hearing more YL's, and more kids getting onto the radios and making contacts.

This year I'm on the Executive of the local club and as a new group of members overseeing club activities one of our focuses early on was to resurrect Field Day as a club activity. Overall our club is in a bit of a slump with membership, so we tried to identify activities that would be FUN for the existing members, and might ATTRACT old and new Hams in the area to rejoin the club.

Bob VE7EZI our club president took a great "Hell or High Water" approach to Field Day, he didn't care if only 5 or 6 of us took part, we were gonna make it happen. Good for you Bob!

Bob VE7EZI and Murray VE7MH found a great new location at a local pioneer tourist attraction North of Vernon called Historic O'Keefe Ranch. This was one of the larger working ranches in our area in the 1800's and now the entire site has turned into a tourist spot with historic buildings (main house, bunk houses, general store, church, saddle shop, ice house, museum building, etc.), tours, restaurant, farm animals, exotic animals, rodeo arena, camp ground, etc.

We found a nice large flat field area at the high part of the property. It was a bit secluded, but it gave us the space and freedom to do as we wished. It was home to 4 enormous old trees spaced about 150-200 feet apart in almost a square shape, and our wire antenna guys started to drool at the prospects that the trees offered.

As a club we had some new signs made to direct the public to our location. And we (very smartly) went to the site about 2 weeks before Field Day and setup our crank-up antenna tower trailer "Cranky" which has been in storage for a few years. This turned out to be an excellent idea as lots of tweaking was done and lots of bugs that might of appeared on Field Day were dealt with. Once onsite the management at O'Keefe let us leave "Cranky" there, so that reduced the amount of hauling around we would have to do on the actual Field Day weekend.
 
"Cranky" setup to the left of the screen with a 3 band Yagi on top working 20m most of the weekend.

 I was so excited about Field Day I personally booked off the Friday so I could pack the 5th wheel and get onsite early. This turned out to be a good idea becasue it took us a few hours on friday night to setup our operating area by eventually parking two 5th wheels side-by-side and lashing some tarps over both of them to provide a roof.

George VA7PRS brought the other RV and it was George and I who camped onsite all weekend and provided security. George also provided coffee and donuts all weekend long :)

Saturday morning the radios arrived and we were on the air and ready for the 11am PST start time for the contest.

During the day we operated Two Alpha so that left everyone time to visit, and play around with other radio stuff. We are so fortunate to have a heavy duty amateur radio satellite enthusiast within our midst and he was onsite to teach us about satellite contacts and with his help we digipeated a message off the International Space Station!!!


All in all a fantastic weekend. I was Net Controller for the club's Sunday Net that weekend so I operated from the site and enjoyed talking to other clubs and their Field Day operations through our Silver Star repeater (VE7RSS - 146.880).

Thanks to all the NORAC members who participated and lent a hand.
Thanks to all the visitors.

Most of all thanks to my daughter Molly who camped with me all weekend, helped me a lot, and was on the best of behaviour :)


Tuesday, May 07, 2013

Ham Shack Update - May 2013

Figured it was time to post an updated picture of the Ham Shack.

Lots of changes since the last posts, feeling a bit neglectful of the blog itself actually.

Changes include...


A 10" digital photo frame streaming all my eQSL cards, much easier then printing them and storing them in a photo album. It runs on a power on/power off schedule, so it's only going during hours when I might be in the shack or have visitors.


Completed my Ham Shack Solar Power System.
  • I started with a large professional panel on the roof 250W / 30A
  • A 30A solar controller in the shack
  • 2 large deep cycle 12v batteries
  • a 12V RigRunner power strip (to power all the radio gear)
  • A 1000W pure sine wave inverter (to power the PC, monitors, and audio mixer amp)
The system can run all the shack radio gear and computer off the hydro grid entirely. During a sunny day the input power from the panel exceeds the drain of all the radio gear running. In the evenings it can run for hours on the batteries alone before needing to recharge the next day. If I want to really stretch the solar power I can turn off the inverter and just power the core HF/VHF radio gear from 12V.


Built up a proper lightning arrestor system for the antenna's and gear. This includes 4 Alpha Delta lightning arrestors mounted to a copper bus bar in a steel enclosure outside at the shack on the wall. All the antenna feedlines (HF and VHF) route to individual arrestors in the enclosure, then patch cables route them into the shack and the radio gear. Large gauge copper ground cable runs from the bus bar to ground rods just a couple feet away. The project isn't finished with weather proofing to follow, but at least it's functional now to protect from lightning and static discharges. We've already head a early spring electrical storm and another if forecast for tonight.


VA7AEJ - RAC - OBS

VA7AEJ is now a Radio Amateurs of Canada - Official Bulletin Station.


Radio Amateurs of/du Canada
RAC Field Organization
 
Official RAC Field Organization Appointment Description
 
Official Bulletin Station (OBS)
 
            Rapid dissemination of information is the lifeblood of an active, progressive organization. The RAC Official Bulletin Station network provides a vital communications link for informing the amateur community of the latest developments in Amateur Radio and RAC. RAC bulletins, containing up-to-the-minute news and information of Amateur Radio, are issued by RAC Headquarters as soon as such news "breaks."
 
            To serve the greatest possible "audience," OBS appointees who can send RAC bulletins over VHF repeaters and via uploading to packet bulletin board systems (PBBS) are of maximum usefulness and much in demand.  If possible, an OBS who can copy bulletins directly from Internet (or the Bulletin Manager) should be assigned to each major repeater in the section. Bulletins should be transmitted regularly, perhaps in conjunction with a VHF repeater net, on a repeater "bulletin board" (tone-accessed recorded announcements for repeater club members), or via a RTTY or packet (computer) mailbox, if one is functioning locally.
 
Duties and requirements of the OBS include the following:
 
1. OBS candidates are required to have and maintain full RAC membership and hold a Basic or higher Amateur Operator’s Certificate of Qualification (or equivalent, as stipulated by the Radiocommunications Regulations).  They should always operate radio equipment only within the limits and privileges of the certificate and qualification held.
 
2. Retransmission of RAC bulletins must be made at least once per week to maintain appointment.
 
3. OBS candidates are appointed by the Section Manager (or by the Bulletin Manager, if the SM so delegates) and must adhere to a schedule that is mutually agreeable.
 
4. OBS appointees should send a monthly activity report (such as FSD-210 under "Schedules and Net Affiliations") to the Bulletin Manager, indicating bulletin transmissions made and generally updating the Bulletin Manager to any OBS-related activities. This reporting arrangement may be modified by the Bulletin Manager as he/she sees fit.
 
5. As directed by the Bulletin Manager, OBSs will include in their bulletin transmissions news of local, section and regional interest.
 
            Recruitment of new hams and RAC members is an integral part of the job of every appointee.  Appointees should take advantage of every opportunity to recruit a new ham or member to foster growth of Field Organization programs and our abilities to serve the public.

Friday, January 11, 2013

The Right Tools Make All The Difference

One of my contacts made during the January 2013 PSKFEST

In my first year of Amateur Radio I've made mistakes and learned lessons. I feel good about the experiences because that's how it's supposed to work. It's a hobby, and hobbies aren't any fun if you are an expert from day one.

In my first year I found a great local deal on coax, it was big (RG-8?), it seemed right for the job.

I ordered some PL-259 connectors, they were cheap and seemed OK.

I dug out my old Weller soldering iron and it seemed to be working fine.

After I built my feed lines I started using them and everything seemed OK.

FAST FORWARD ONE YEAR...

Here is what I've learned...

I got a RigExpert AA-230 antenna analyzer for Christmas this year, it was a combined gift from my employer for 10 years of service, and I kicked in the other half of the cash as a gift to myself. One of the reasons I upgraded to this particular model of RigExpert is that it also supports the feature of a Time-Domain Reflectometer.
  
A time-domain reflectometer (TDR) is an electronic instrument used to characterize and locate faults in metallic cables (for example, twisted wire pairs, coaxial cables).


Using the AA-230 I started testing my feedlines and patch cables and found some problems. The two significant ones were...
  • Some of my PL-259 connectors were installed badly. Over soldering, under soldering, melting, bad trimming. You name it, I probably messed it up.
  • Some of that "great deal" local coax I sourced was 75 ohm and not 50 ohm. Without any labeling on the cable, I couldn't tell.
Over the last few weeks I've been sourcing and purchasing new and better tools for the job. Last night I sat down to repeat the task from one year ago, a year of learning, listening, and using my radio gear for numerous fun and exciting new things.

So how did it work out?


I got some excellant 50 ohm coax sourced from other hams (used) and ham dealers (new). The right cable is easier to work with, and solder with.


I ordered some Amphenol PL-259 premium connectors. Three other local club members shared in the order and the expense. Buying in bulk our cost per connector was cut in half.


I picked up a better and professional MetCal MX-500 soldering station. I bought this used for $100 this is a great quality piece of equipment. New units are $600+, these are so well built they can run all day, every day, for 10+ years. They heat with RF energy right to the tip, have automatic temperature control, don't need calibration, and ton's of tips are available for soldering, reworking, desoldering, and SMT part placement. Incredibly versatile. Not to mention they heat up and are melting solder in 3-5 seconds.

So with the right tools, the job was way quicker, looked much more professional, and with the AA-230 I can test and verify the cable is problem free BEFORE putting it into use.


Sunday, December 09, 2012

Flex 5000 Diary - HRD, Virtual Stuff, and Digital Modes


I'm so sorry... I have not been diligent on updating the blog or reporting on the continued progress of the Flex 5000 Diary.

Well maybe I'm not sorry? Maybe the reason I haven't done an update is that I've been having so much damn fun learning and doing new things.

Things like...
  • Testing my summer antenna projects with a Rig Expert antenna analyzer.
  • Joining the Executive of my local ham radio club (Vice President).
  • Connecting my Flex to Ham Radio Deluxe via virtual serial ports and virtual audio cables.
  • Getting things setup for digital modes and making a dozen or so contacts via PSK31.
  • Voicing a news story for Amateur Radio Newsline Episode #1831
  • Installing a Kenwood dual band mobile in my car and moving my ham plates onto the car.
With all that said the notable new stuff for my Flex 5000 Diary HRD connectivity and digital modes.

Ham Radio Deluxe is a CAT control program meant for a serial or USB connection between your CAT compatible transceiver and your computer. I was a big fan of HRD prior to the Flex when it was paired with my Yaesu via serial port for CAT control and logging.

With the FlexRadio the PowerSDR software already controls the radio and adding a second control application on the same PC creates the question 'how does a computer connect to itself via a serial port' Can you have one app using serial port COM1 and then a cable looping back into the same PC on COM2? Well that sounds silly and there is a much better solution Virtual Com Ports.

I used a program called vspMgr to create a phony pair of serial ports inside of Windows. These two virtual com ports appear to the system as two normal com ports, but in reality that are paired to each other. One sends it's traffic to the other, and the other sends it traffic back to the first. So it's the same results as two seperate com ports looped to each other, but without any cables! In this case I created a pair of ports COM7 and COM8. In PowerSDR the software from Flex I configured it to use COM7 for a CAT communication port. Then in Ham Radio Deluxe I configured it to use COM8 to connect to the radio. BANG! virtual serial port connections between two applications on the same PC.

Next step is audio links between the same two applications. This would traditionally be done via audio cables between the radio and the soundcard in or external to your computer. But using another application called VAC (virtual audio cable). I'm able to create audio links that operate exactly like the virtual serial port pairs. PowerSDR and Ham Radio Deluxe are sharing audio back and forth within the operating system with no 'real' audio cables.

Just to be clear the only physical connection between the radio and the computer is just the firewire 1394 cable, no 'real' serial cables or audio cables.

So with that completed I can fire up the Flex 5000, then load up PowerSDR software.

Then I can load up HRD to access all my saved favorites, the built in logger app, and digital modes app.

Some have commented that I don't need all of HRD and I can get away with smaller lighter applications that just do logging and digital modes, but right now I'm sticking with the app that feels familiar. This is already a lot of learning I'm doing on my own, so forgive me if I take it one step at a time.

With all these connections working it was time to load the Digital Master 780 application within the HRD package and get onto PSK digital mode for the very first time as a licensed amateur.

As you can see from the QSL cards posted below I was working Hawaii and Switzerland in the first weekend with about 30-35 watts!


Friday, October 12, 2012

Flex 5000 Diary - Troubles and Resolutions

I've learned a lot in the last 24 hours and it wasn't all fun or easy.

The Microphone Problem

I still have a support ticket open with Flex for my new radio's front microphone connector, but today I got the go ahead to open the case and inspect the ribbon cable connection from the circuit board to to the front panel.

WHAT DO YOU KNOW IT WAS DISCONNECTED!!!

So I re-connected it, put the radio back together and BAM, my Heil mic and hand switch are working. Dudley the Flex tech support guy is great to deal with.

The Crash Problem

Last night was tough. After a couple of evenings playing around on 80m and 40m I finally had band conditions suitable for playing around on 20m as well. So on 20m I keyed the mic and the PowerSDR software froze and died! I rebooted everything and tried again, same result. I rebooted and went back to 80m and 40m, no problems. I then went back to 20m and keyed the mic once again, and CRASH.

This pattern of crashes and reboots went on for a few hours of troubleshooting and I finally went to bed frustrated. As I sat watching TV I composed an email to the Flex owners mailing list and for the next 24 hours I got some great replies from people with solid advice and things to try.

#1 - Better Firewire Cable - So today I started by ordering a new 6 foot firewire cable from Granite Digital. This premium cable was highly recommended by multiple responders to my email. CHECK!

#2 - Better Grounding - Second I built some insanely big shielded grounding cables. One will go from my ground system to the back of the Flex (replacing the one I was using). And the second will go from the back of the Flex to the back of my PC. As multiple people reminded me an SDR is one radio made up of two components (the 5000a and the PC). I went to a car audio shop for the great flex cable and suitable connectors and I borrowed the solder pots at work to dip the ends for a nice fit and finish. Do you think I over did it? CHECK!


#3 - Shield from RF - The unanimous advice from all the hams who responded to my email was clean up the RF. So with the help of a dozen snap-on ferrite's I put them everywhere. Both ends of the firewire cable (2 per end), the PC power cord, both monitor cables, the PC audio cable, etc. I also looked at all the cables running around and tried to clean up their paths and eliminated anything not required. CHECK!

#4 - Check DPC Latency - DPC is apparently important in SDR and checking the systems DPC score is a way of knowing if your systems passes or fails. I downloaded an app called DPClat and my QuadCore passed well under the recommended level of 350 or lower (my score average between 175 - 200). CHECK!

So with all that extra work I crossed my fingers and plugged everything back in. Powered up the Flex and the PC, and loaded PowerSDR.

I don't want to jinx it, but two hours have gone by and no crashes. I tested on multiple bands with the drive on the radio set to full 100 and everything is working GREAT!

Wednesday, October 10, 2012

Flex 5000 Diary - Installation & First Impressions


Well the bands last night were garbage. The usual net traffic was struggling and it wasn't conditions that I would of liked on the first evening with the Flex radio.

After unboxing I took my time and put Anderson Powerpole connecters on the power cord and connected the best ground cable I have. I cleaned up all the wiring from the previous radio and tried to make the cleanest and RF free environment for the Flex right from the start.

I had already installed PowerSDR 2.4.4 prior to arrival so it was just a matter of powering up the Flex and letting the drivers install in Windows as the firewire device is detected for the first time. In my case a firmware update for the 5000 was required and installed as part of this detection process as well. When PowerSDR finally booted for the first time I paniced as the software crashed with multiple errors connecting to the radio. Since the firmware was just updated I stopped, BREATHED, powered off the radio, turned off the 12v power supply, rebooted the PC, and started everything up fresh again. This was all that was needed to initialize the radio with the new firmware and PowerSDR loaded with no other problems for the rest of the night.

After setting up the basic startup settings for PowerSDR I realized that my Heil HM-Pro and CC1Y cable did not appear to be working. I tried numerous things and eventually created a Trouble Ticket with Flex Radio Support and switched to a trusty old xlr Shure 58 and plugged into the Balanced Input on the back of the radio. No PTT, but it was workable for the evening clicking on MOX with the mouse to transmit.

UPDATE - Flex Support has already replied to my ticket and I'll try their suggestions tonight.

So now I was operational with PowerSDR and I just played for a few hours with the settings, features, filters, DSP, etc. It was just incredible and exactly what I had hoped for. As I mentioned before the band conditions were horrible but I could tell that I was getting better reception than a lot of the others and even provided relay for the first time ever on a daily 80m net.

I have three separate HF antenna systems to work with and  never have I been able to switch so quickly between then and compare their performance both by ear, and visually on the Panafall display in PowerSDR. If you had asked me before yesterday I would have been extremely confident that my 80 Horizontal Loop was my best antenna, but with the visual display options on the PowerSDR display I could see subtle differences when comparing the Loop (ANT1) to my G5RV (ANT2) on certain bands. Differences I couldn't hear, but ones I could 'see' had slightly less noise and better signal reception on certain bands. My 3 element tri-band Yagi (ANT3) also had a chance to shine while I compared it's performance on 10m, 15m, & 20m.  Thanks Flex! I love that feature.

With the built in Antenna Tuner option in the Flex it was quick at tuning every new band and frequency as I scanned around and the only time it failed to tune is when the wrong antenna was selected for the band I was trying to tune on. But even then I got to see the tuner at work and how PowerSDR warns you when it fails to tune and your SWR is too high to transmit on.

It did take a while to figure out navigation in PowerSDR with the mouse and keyboard, but it only took an hour and I was moving around the band and narrowing in on weak signals with great success and incredible clarity.

I'm lucky that in my first year as a licensed ham radio operator I've owned and played with 3 distinct generations of HF radios. A 1970's Kenwood with no DSP. An early 2000's Yaesu with basic DSP and some noise cancellation, and now a brand new premier software defined radio with all the bells and whistle of filters, DSP, noise reduction, and a top tier receiver.  WOW


Flex 5000 Diary - Arrival


My Flex 5000a arrived today in the mail. Trust me I was worried about Canada Post Expidited Parcel Service instead of a courier with overnight air, but alas the Flex busted the budget and I didn't have the extra $143 bucks for the courier.

Anyhow, exactly a week from the order date the package arrived and I rushed home from work to beat the closing time for the local village post office.

Outer packaging looked good.

No strange sounds when handling the package that might indicate breakage.

So straight home for a quick unboxing video and an evening of setup.


Friday, October 05, 2012

Flex 5000 Diary - SDR Explained

http://en.wikipedia.org/wiki/Software-defined_radio

A software-defined radio system, or SDR, is a radio communication system where components that have been typically implemented in hardware (e.g. mixers, filters, amplifiers, modulators/demodulators, detectors, etc.) are instead implemented by means of software on a personal computer or embedded system.[1] While the concept of SDR is not new, the rapidly evolving capabilities of digital electronics render practical many processes which used to be only theoretically possible.

A basic SDR system may consist of a personal computer equipped with a sound card, or other analog-to-digital converter, preceded by some form of RF front end. Significant amounts of signal processing are handed over to the general-purpose processor, rather than being done in special-purpose hardware. Such a design produces a radio which can receive and transmit widely different radio protocols (sometimes referred to as waveforms) based solely on the software used.


Now that I have a software defined radio (SDR) ordered and en-route I plan to document everything as much as possible for my own benefit, and possibly others who may stumble onto these pages.

As the description above states SDR is a new generation of radio where a large portion of the electronic hardware formerly embedded into a receiver or transceiver is built in software and run on a personal computer.

This is overly simplistic, but think of it as a traditional radio transceiver chopped in two.
  • The first half is a box that contains just the essential electronic pieces of a traditional radio (for simplification let's say it's the power supply, receiver and transmitter).
  • The second half of the radio is your personal computer running a software package that emulates all the other pieces of a traditional radio that are now missing from the first half (filters, signal processing, control interface, etc). 
  • With a high speed digital connection cable between the two halves (Firewire, USB, or ethernet), we now have a complete radio again.
The Advantages of a SDR?
  • The first half of the radio can be simplied and the quality of the components can be increased because the overall cost of the hardware is now much lower. You can spend your development money on building a better receiver and trasmitter.
  • Personal computers have tons of processing power, way more then the embedded chips used in radios for filters, dsp, etc. Your home pc or laptop is able to beef up the speed and flexibility of it's half of the radio due to sheer processing power. 
  • Display and control of the radio is done on your computer screen. The bigger the screen (or screens) the bigger the interface and options.
  • Display modes, with a click of the mouse you have many different ways of viewing the signals and the entire band. 
  • Software is easily and quickly upgradeable. With every new version of the software new filters, better DSP, and improvements to the radio control interface can be released. Your SDR get's better and better with time as long a software development continues.
  • Digital, digital, digital. Even when integrating with other software applications for digital modes, CW, etc you can exchange audio back and forth in digital with little or no quality lost.
The Cons of SDR?
  • You need a PC or Laptop of decent performance to run your radio, it just won't work without it.
  • An unstable computer can result in an unstable radio. Nobody would of thought that their HF rig could suffer from a Blue Screen of Death (ha ha).
  • Power Consumption, a personal computer, monitors, SDR radio and power supply draw way more hydro then a traditional transceiver running off a 12v power supply.
  • In an emergency you have to keep the computer and radio running to have communications.

I've traded a Unimog for a New Roof and a Flex 5000

This is the last picture of me and my Unimog. My daughter Molly ran outside and took this as I was getting ready to deliver it to the new owner.

It was a tough decision to sell but I'm personally thrilled with the new owner and expect he will enjoy this truck as much as I did.

The proceeds from the sale will pay for a new roof on my house next spring, and a big new toy in the Ham Shack, a FlexRadio Systems 5000a transceiver.


 The 5000a with the ATU add-on (factory installed) has been ordered and is en-route. Fingers crossed it might even arrive today?


Monday, September 03, 2012

The Summer Build Season & My 80 Horizontal Loop Antenna

As a newly licensed amateur radio operator, 2012 has been a long list of 'firsts'. Including my first summer of building, installing, and testing antennas.

My final summer task was a complete home-brew antenna project. I had already bought a couple other antennas (G5RV, Mosely CL-33 tri-bander, and Arrow VHF/UHF vertical), but I wanted to put in the reasearch and build something from scratch.

Over the last two months I have casually gathered, built, and made steady progress on an 80m Horizontal Loop that I completed just a few days ago.

Unlike my previous posts there isn't much to show (ie photos or videos) since a long wire antenna strung up about 30+ feet in the air is not easy to see, let alone with my camera. Suffice to say here is a description and I've climbed up the ladder one more time to get a couple photos.

Corner #1 - My 40' steel antenna tower attached to the house.
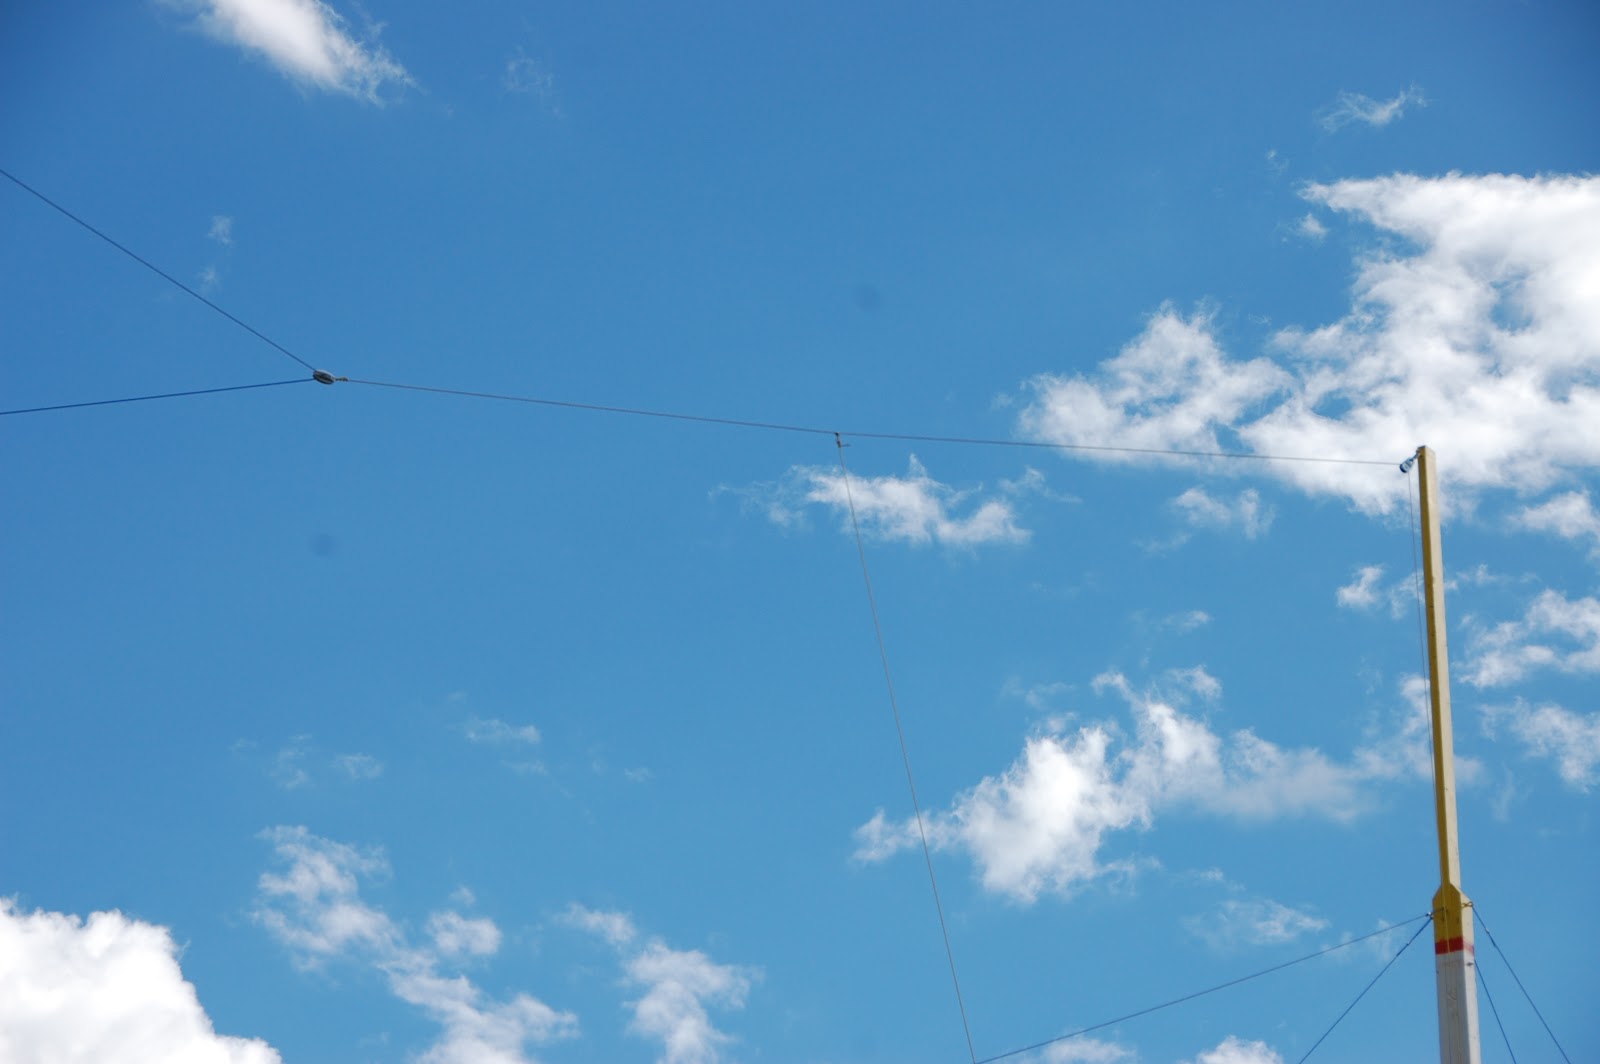
Corner #2 - My wooden antenna mast that I built just for this antenna. To build a horizontal loop you need to string it up in a square shape (or as close as you can get). I had anchor point on 3 corners of the property, but this corner needed something man made, so I built this mast.
Corner #3 & #4 are connected to two large Willow trees in the south-east and north-east corners of my property. Thanks to VE7SDV (Sam) for climbing both trees a couple weeks ago.

The 270' of coated copper wire is strung around all four corners in a rectangular shape. At each corner the wire passes through an insulator to keep it away from contacting ropes, branches, etc.

At the corner closest to my house a feed point was created using a plastic wheel from an old clothes-line. I drilled multiple holes to pass the wire through and secure the ends of the full length of wire. 450 Ohm ladder line was then soldered to the two ends. Tie straps secured everything.
The ladder line makes a straight vertical drop about 6-8 feet away from the roof and exterior wall of my house. It then slopes back into the wall about 6 feet off the ground and connects to this 4:1 Balun. 50 Ohm coax completes the run into my shack and antenna tuner.

So far this antenna has exceeded the performance of the G5RV. I did some switching back and forth and it appears to be better reception. Time will tell as I've only had a couple days to test it out.


I've also cleaned up the 12v power arrangements in the shack by wiring in a RigRunner 4010S switching power strip from West Mountain Radio and switching all the gear over to Anderson Powerpoles. I had to invest in a 2nd Weller soldering iron and a nice crimping tool, but now I have a large high wattage iron for cable creation etc, and a precise lower wattage iron to tackle circuit board work.

I must say the 4010S switching power strip is very nice. In the Auto mode I can leave the power supply and power strip turned on and simply hit the power switch on my radio to trigger an automatic power up of all the other connected devices (SWR meter, In-Line Noise Module, etc).


So as the title of this post states, my first summer as a licensed ham is nearing an end. And as I have joked with others, now I actually need to start using all this gear and antenna's and starting some serious DX'ing.

No matter what the upcoming fall and winter seasons have in store for the bands, I'm pretty sure I'll be ready :)

Monday, August 06, 2012

'Poor Hams' Wooden Antenna Mast

I was researching antenna mast ideas a 3-4 weeks ago because I want to put up an 80m Horizontal Loop antenna before the fall. I have a monstrous row of trees down one side of my property so that will supply two corners of this big square in the sky. I have the steel tower attached to the house and right next to my Ham Shack so that will provide the 3rd corner and a point for the feedline to connect. The 4th corner was a problem though...

No suitable trees, a power pole nearby that services my property and the neighbors. I needed to stay away from the power lines and yet get that fourth corner of the Horizontal Loop up in the air almost 40 feet.

Steel masts, steel towers? And then I stumbled on a couple websites talking about wooden masts.

They are cheap to build, are strong enough if supported by guy lines, and perfect for something like one corner of a wire antenna like the Horizontal Loop.

Panorama of the 42' total length wooden mast
For just under $200 I bought everything I needed from the local hardware store.
  • x1 - 16' 2x4
  • x2 - 16' 2x6
  • x2 - 20' 2x4
  • x1 - 20' 2x6
  • 5/16 ready rod with washers and bolts (these were cut to bolt boards together every 2-3' along the entire length. Six-inch bolts would also do the trick with no cutting.
  • 1 tube of PL-Premium glue.
  • 6 inch threaded steel pipe with threaded end caps (tilt over bolt). 
  • one hour rental of post hole digger. 4-foot auger (longest I could rent).
  • 5 bags of ready mix cement.
  • 5 eye bolts (4 for upper guy line connections, 1 for antenna wire connection).
  • 1 pulley for the line connected to the antenna.
  • 4 insulators for between the antenna wire and the support line.
  • 2 fifty-foot lengths of poly rope.
  • A 500-foot roll of 1/8 steel cable (lots of leftover).
  • 16 crimp sleeves for cable (1/8 size).
  • 8 saddle clamps for cable (1/8 size).
  • Best as I can remember that's the entire shopping list? I already had paint.
Weekend One
  • Assemble the mast on the ground or on saw horses
  • About 2 hours of work.
Weeknights
  • Paint the entire mast, at least two coats.
Weekend Two
  • Dig hole
  • Remove lower bolts and bend the tower over in the tilt-down position.
  • Lying on the ground it now looks like a large -- 7  --
  • Drop the lower section into the hole.
  • Level the lower section to perfectly vertical.
  • Mix and fill the hole with cement.
  • About 2-3 hours of work
  • Let the cement cure for 5-7 days.
Weekend Three
  • Attach eye bolt and pulley to the top of the mast, attach two lengths of rope connected with an insulator at the center through the pulley.
  • Attach 4 eye bolts about seven feet from the top (into the section of three 2x4's laminated together). One on each side.
  • Attach approx 75' of cable (or more) to each eye bolt, secure the loops from crimp sleeves. 
  • For the purpose of instruction, the tilt over portion of the antenna is pointed North. The tail of the tilt over portion is pointed South.
  • Have one person hold a guy line on the East and West side of the antenna. As it tilts up these people just keep the antenna from tipping to either side.
  • I was in the North position with the main part of the mast in the tilted over position. I used an aluminum extension ladder to support the weight of the antenna. I was able to extend the ladder one section at a time to slowly lift the weight of the tower in a safe and controlled manner.
  • A fourth person was on a step ladder in the south position at the tail of the tilt over section.
  • As my section went higher, his section came lower. 
  • Eventually, my ladder was fully extended up, and the tail had lowered so the person at the back could pull down and the transfer of weight shifted. He could lower the tail completely and the tower was now vertical.
  • Quickly reinsert the bolts below the tilt over point to secure the lower section of three 2x6's back into a solid block. Tighten the bolts so friction between the 2x6's is your friend.
  • Secure the East and West guy lines first, these are the weakest directions the mast has.
  • Next secure the North and South four guy lines. 
  • Adjust each line until taut while making sure to keep the mast as vertical as possible (use a level). 
  • Approx time 1-2 hours with the help of 3 other people. The two people on the guy lines do not have to be strong, the two on the north and south positions do all the lifting.
I made a PDF of a diagram to share.


And finally, I took all my photos from the last few weeks and put them into a video slideshow with some video at the end showing off the completed work.


Readers, search the blog for multiple update articles on the history of this mast.
Use the article name as the search term 'Wooden Antenna Mast'

Wednesday, July 11, 2012

Ham Shack Upgrade Diary #4 - The Bench and Shelves

I have a yellow workbench/desk that I built years ago that wraps around two walls in my home office. When I decided to setup a ham shack I took out an old drafty patio door that I never used and framed in a wall where the door used to be. I then extended the workbench/desk around that corner of the room and extended it past the new wall.

Now I had bench that wrapped around 3 sides of the room and new ham shack section that I built a few months ago needed to be taken back outside and painted to match the rest of the finished bench.

The weather had finally gotten hot and dry enough and the propagation was miserable so I decided now was my chance.


Between coats of yellow paint I went out to the shop and finished the shelve that I had started for above the bench. Once it was completed I stained it as well.


After both the desk and shelf were dry I moved them into the house and got them bolted into place.


After another day to dry I finally got the shack all setup again last night and was back on the regional 80m net.

The finished upgrade project